In the following article the author explains how having a project template ready to hack on is the primary key for winning an hackathon, since that will enable quick feedback and velocity towards shipping the project.
https://dev.to/code42cate/how-to-win-any-hackathon-3i99
Hackathons are a great way to learn random stuff, meet new people, and build cool projects. I met some of my best friends at hackathons and financed my college degree just with prizes. What I realized you need most to win are two things: a fast feedback loop and velocity. Let me show you how I try to optimize for both, including a nice open-source starter template that you can use for your next hackathon 👀

Fast Feedback Loop
The feedback loop is the time between you writing a line of code and your team shouting out of joy (or despair 🫠). Making your feedback loop faster keeps your team motivated and allows you to iterate faster.
Moving from dev to prod is usually the biggest bottleneck during development, be it because of slow deployments or the need for approval. Luckily, this is not the case for hackathons! Your dev can be prod, and your deployment can be your local machine. The best way to do this is to have a live preview of your app. This completely removes the need for a deployment and allows you to iterate as fast as possible. (This also removes the need for your non-techies to replicate your dev environment!)
While there are a few ways to do this, I enjoy using Livecycle. Livecycle has a Docker extension that enables you to share your docker-compose apps with a single click (even easier than something like ngrok!). It’s free and can be installed in less than 2 minutes. Install the Livecycle Docker Extension and you will find this new page in your Docker Desktop Dashboard:
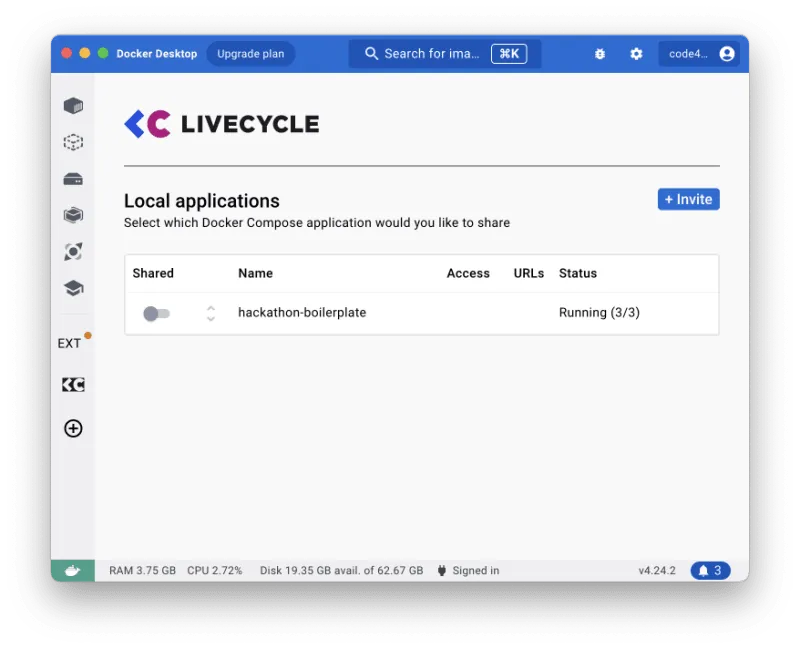
Livecycle Dashboard
Simply click on “Share” and you will get a unique URL per Docker container that you can share with your team. Each URL tunnels to your local containers, making it super easy to share your progress! 🚀
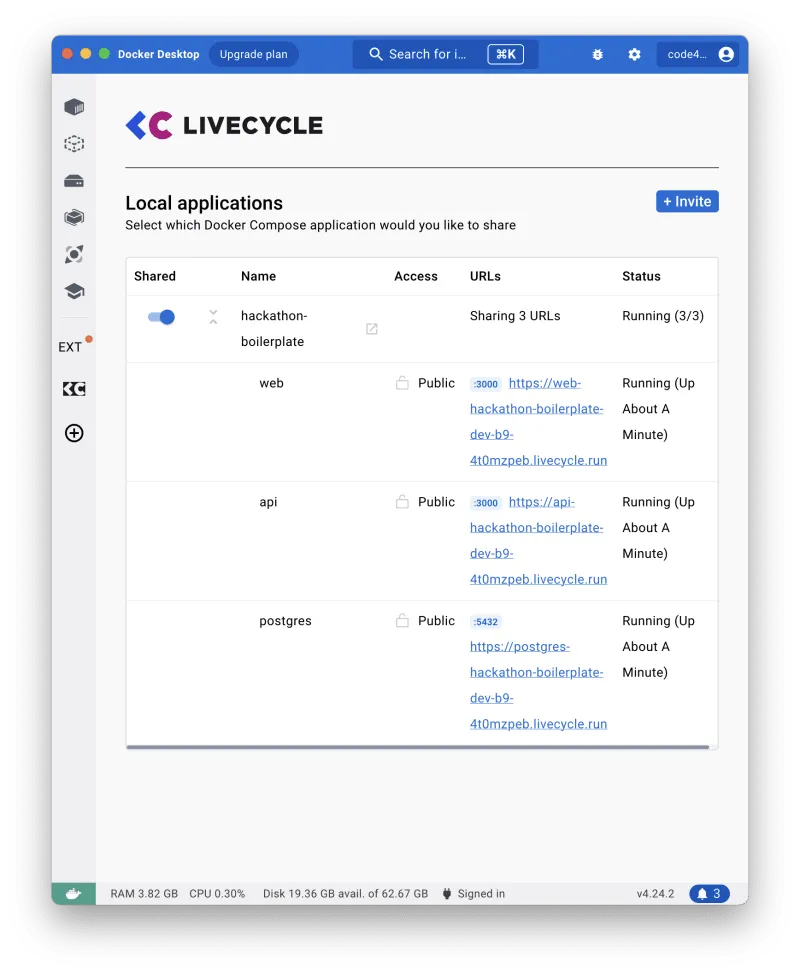
Shared Apps
Velocity
In a setting where time is the major constraint, you obviously want to move as fast as possible. When wasting time to set up your project could lose you a lot of money, having a great template is crucial. I have a template that I use for most of my hackathon projects. It is a monorepo with a Next.js frontend, a Hono backend, and a Postgres database. It is completely dockerized and can be started with a single command. It also includes a few other goodies such as Tailwind, ShadcnUI, and Prisma. In combination with Livecycle, this allows techies in my team to get started in less than 5 minutes, and non-techies to see the progress in real-time.
Setup
The setup is pretty straightforward if you have docker and docker-compose installed.
First, clone the repository and change your directory to the root of the project:
git clone https://github.com/Code42Cate/hackathon-starter.git
cd hackathon-starter
Rename packages/database/.env.example to packages/database/.env and start everything with docker-compose:
docker-compose watch
PS: docker-compose watch is basically docker-compose up, but with hot reloading for the api and the web app!
Push database schema:
pnpm turbo db:push
And you are ready to go! Let’s take a closer look at what the template offers:
Next.js Frontend
Using a mainstream framework with a great ecosystem and many developers capable of working with it has many advantages, especially if there isn’t any time to teach your teammates a new framework.
You can find the entire frontend in /apps/web. To get started the index page contains a simple CRUD table that allows you to create, read, and delete users from the database:

CRUD
Most hackathon apps are completely different, which is why I have kept the frontend as lean as possible. The index page only contains the table and data fetching:
import { User, columns } from "./columns";
import { DataTable } from "./data-table";

async function getData(): Promise<User[]> {
  const data = await fetch("http://api:3000/users").then((res) => res.json());
  return data as User[];
}

export default async function Page() {
  const data = await getData();

  return (
    <main className="flex flex-col items-center py-4">
      <DataTable columns={columns} data={data} />
    </main>
  );
}
Most notably, the fetching of the data is done with fetch("http://api:3000/users"). This is because the frontend and the backend are running in separate docker containers. The api container is reachable from the web container on the api:3000 address.
ShadcnUI component library
ShadcnUI is an awesome open-source component library that has a few very high-quality components. You can find all components on this page. If you find something that you want to use, you can either add it manually by copy-pasting into /packages/ui or by running:
pnpm turbo ui:add <component-name> # for example, accordion
Using ShadcnUI is completely optional but it can save you a lot of time if you find something that you can use. If you don’t want to use it, simply ignore it 🫣
Postgres Database
As a database, I am using Postgres. Not because it is the best database, but because it is the one that I am most familiar with. Feel free to use whatever you want! The database is started with docker-compose and can be accessed on localhost:5432. The credentials are defined in docker-compose.yml and are hardcoded for simplicity. You can change them if you want to, but you probably have better things to do!
If you want to use something else, you will need to change it in the docker-compose.yml file as well as in the packages/database/.env, and in the packages/database/schema.prisma file.
Everything else should still work!
Prisma ORM
Prisma is an ORM that allows you to interact with your database in a type-safe way. It is very easy to use and has a lot of cool features. You can find the entire database schema in /packages/database/schema.prisma. To use it, simply import like this:
import { PrismaClient, User } from "database";
If you create a new app/package, you need to add it to your package.json first:
{
  ...
  "dependencies": {
    "database": "workspace:*"
  },
  ...
}
If your types are not working in your editor, you might need to run pnpm install in the root of the project. For some example code on how to use Prisma, check out the next section!
Hono Backend
Although you can do 99% of the backend things with Next.js server actions, having a ready-to-go backend is still nice. Hono is a super lightweight and easy-to-use backend framework, making it instantly usable, even if you have no experience in it.
You can find the entire backend in /apps/api. All routes are defined in /apps/api/src/index.ts. Remember, this is for a hackathon and not for production. Feel free to put everything in one file if you want to (I won’t tell your boss, I promise)
import { serve } from "@hono/node-server";
import { Hono } from "hono";
import { cors } from "hono/cors";
import { PrismaClient, User } from "database"; // our own database package (/packages/database)

// Connect to the postgres database with prisma
// The connection string is defined in docker-compose.yml in the api service.
// This should work out of the box unless you change the postgres setup
const client = new PrismaClient();

const app = new Hono();

// No one likes cors errors
app.use(
  "*",
  cors({
    origin: ["http://localhost:3000"],
  })
);

// Get all users
app.get("/users", async (c) => {
  const users = await client.user.findMany();
  return c.json(users);
});

// Create user
app.post("/users", async (c) => {
  const data = await c.req.json();
  const user = await client.user.create({ data: data as User });
  return c.json(user);
});

// Delete user by id
app.delete("/users/:id", async (c) => {
  const user = await client.user.delete({
    where: { id: Number(c.req.param("id")) },
  });
  return c.json(user);
});

// Start nodejs http server. Change this if you want to use something like cloudflare workers
serve(app);
As you can see, it is pretty straightforward. You can use the client object to interact with the database. The app object is a Hono app, which is basically a collection of routes. You can define routes with app.get, app.post, app.delete, etc. The c object is the context of the request. It contains the request and response objects, as well as some helper functions such as c.json to send a JSON response.
You could of course have the exact same functionality in Next.js, but some hype-driven development is part of the fun right? 🙃
Docker 🐳
I’m usually not the biggest fan of using Docker for quick-and-dirty hackathon projects because I feel like it slows me down. However, ever since Docker released docker-compose watch, I’ve changed my mind! It basically allows you to have a very uncomplicated development setup with hot-reloading out of the box. Let’s take a look at the specific Docker setup:
# docker-compose.yml
services:
  web: # Next.js Frontend
    build:
      dockerfile: web.Dockerfile # Path to web Dockerfile
    ports:
      - "3000:3000" # Reachable on localhost:3000
    depends_on:
      - api # Start after the API
    develop:
      watch:
        - action: sync # Synchronize the files on your host ./apps/web with your containers /app/apps/web when any file changes in that path
          path: ./apps/web
          target: /app/apps/web
          ignore:
            - node_modules/
        - action: sync # Same as above but with component library
          path: ./packages/ui
          target: /app/packages/ui
          ignore:
            - node_modules/
        - action: rebuild # Rebuild if the package.json changes
          path: package.json
        - action: rebuild
          path: ./apps/web/package.json
  api:
    build:
      dockerfile: api.Dockerfile # Path to API Dockerfile
    ports:
      - "3001:3000" # Reachable on localhost:3001, or api:3000 from within the Docker network
    depends_on:
      - postgres # Start after the database
    environment:
      - DATABASE_URL=postgres://postgres:postgres@postgres:5432/hackathon # Hardcoded database credentials are usually a no-go, but totally fine in this situation
    develop:
      watch:
        - action: sync # Synchronize the files on your host ./apps/api with your containers /app/apps/api when any file changes in that path
          path: ./apps/api
          target: /app/apps/api
          ignore:
            - node_modules/
        - action: rebuild # Rebuild container if the package.json changes
          path: package.json
        - action: rebuild
          path: ./apps/api/package.json
  postgres: # Postgres Database
    image: postgres:latest
    ports:
      - "5432:5432" # Reachable on localhost:5432 if you want to connect with something like DataGrip
    environment: # Again, usually not a good idea to use these hardcoded credentials but okay for a hackathon
      POSTGRES_USER: postgres
      POSTGRES_PASSWORD: postgres
      POSTGRES_DB: postgres
TL;DR: We define the frontend, backend, and database as a service. In addition to the normal docker-compose setup we also add the config for docker-compose watch that enables us to have hot-reloads!
Both Dockerfiles (api.Dockerfile and web.Dockerfile) are in the root of the project and are optimized to be used for developing, not as production build.
You shouldn’t need to touch them, but here is a quick explanation:
# You might want to use a different node version if you need any special libraries
FROM node:20.5.1-alpine AS base

FROM base AS builder
# not necessarily needed but often the cause for weird bugs
RUN apk add --no-cache libc6-compat
RUN apk update
# Set working directory
WORKDIR /app
# We need turbo to work with the monorepo
RUN npm install -g turbo
COPY . .
# remove everything from the monorepo that is not needed
RUN turbo prune --scope=api --docker

# Add lockfile and package.json's of isolated subworkspace
FROM base AS installer
RUN apk add --no-cache libc6-compat
RUN apk update
WORKDIR /app

# First install the dependencies (as they change less often)
COPY --from=builder /app/out/json/ .
COPY --from=builder /app/out/pnpm-lock.yaml ./pnpm-lock.yaml
RUN corepack enable && corepack prepare [email protected] --activate

RUN pnpm --version
RUN pnpm install --frozen-lockfile

# Build the project
COPY --from=builder /app/out/full/ .
# We could properly build the project here, but we don't need to because this isnt for production we want hot reloads :)
CMD pnpm dlx turbo run dev --filter=api
The Dockerfile might seem a bit complicated (it is), but the reason for that is mostly just turborepo and the need for good caching. Realistically, you will only need to change the last line, if at all. It is based on this awesome Github Issue.
Livecycle
As already mentioned in the beginning, Livecycle allows us to share our docker-compose apps with our team and judges by creating ✨tunnels✨. This is super useful because it allows us to share our progress in real-time, without having to deploy anything. It also allows non-techies to see the progress and give feedback. Since it’s “just” a Docker extension it is not part of the repo. Instead, you can simply install it from the Docker Hub.
Conclusion
Ultimately, the only thing that matters is that you move quickly and have fun. Build your own template, and use tech that you are already familiar with. Create some cool stuff!
Until next time,
Jonas :D