The following article explains several ways and tools a person can use to successfully intercept an Android Application HTTPS requests.
We all know there are a plenty of articles available for “How to intercept the HTTPS traffic of Android apps” , So here we are not going to cover them. If you have not found any, Refer the following:
Configuring an Android Device to Work With Burp — PortSwigger
Prerequisites:
Familiar with BurpSuite proxy, Basic Android Pentesting and tools such as adb, frida, Objection, Magisk application, Decompiling/Recompiling APK, and APK signing.
Table of Contents
- Does my target app have SSL pinning?
- Wait, How we can confirm the Pinning?
- Time to Bypass
- Why I am not able to intercept the app traffic even if the app is Working with HTTP
1. Does my target app has SSL pinning??
I got it, that sounds like a joke, because you guys know If the pinning is in place, then we won’t be able to capture the HTTPS traffic of our target android application.
2. Wait, How we can confirm the Pinning?
After setting up the proxy in both the device and the proxy server (Burp), Fire up the target application, then do some activities that makes a communication between the target application and their server.
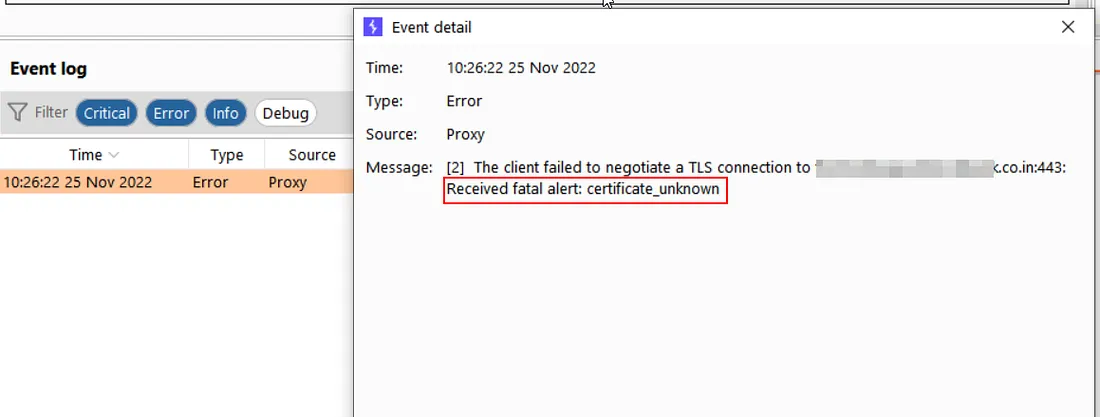
Time to monitor the Burp’s dashboard, in specific, the Log section. If the Pinning is in place, then we will be able to see a Certificate error as follows:
2. Time to Bypass
2.1 Move Certificate — Magisk Module:
If your device is rooted with Magisk Application, Then Move Certificate module is one of good option.
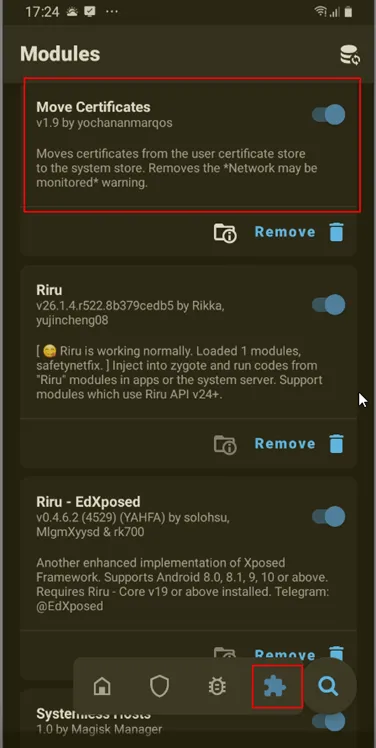
This module will move the user trusted certificates to the system store , making the system (root) trust the Certificate which the user install (Our proxy CA certificate)
2.2 Objection tool
Repo: sensepost/objection: 📱 objection — runtime mobile exploration (github.com)
Step 1: Make sure the frida server is running on the android device
Step 2: Attach the target application with objection with the following command:
Objection -g <pkg name/ PIDexplore
Then execute the “android sslpinning disable” command
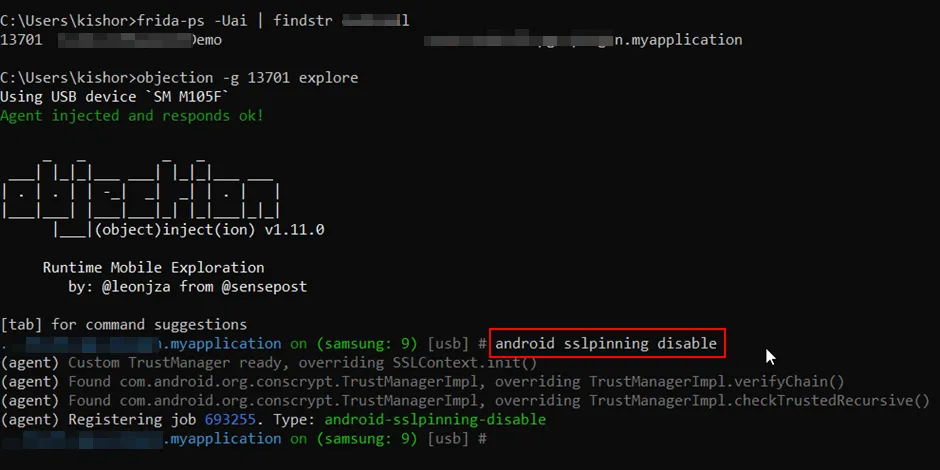
Thats it , the script will find the SSL pinning classes and hook them during the runtime in order to byass the Pinning.
2.3 Frida Framework
Repo: Frida (github.com)
Here comes the most popular and widely used method.
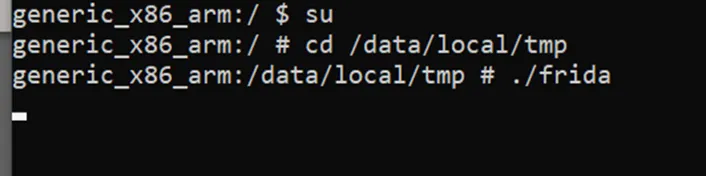
Step 1: Make sure the frida server is running on the android device
Step 2: Attach your target application with frida and run your favorite SSL bypassing script.
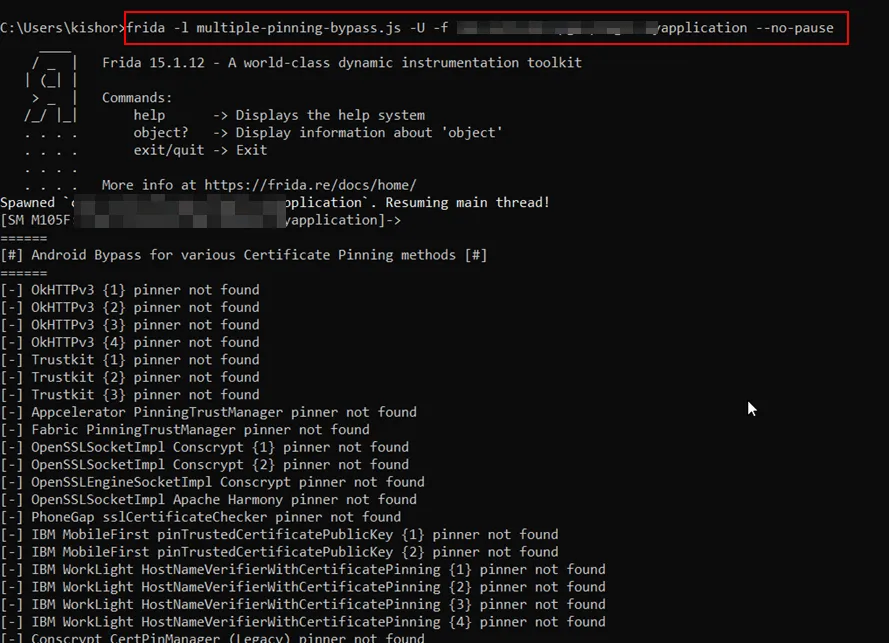
Following are my favorite scripts:
https://codeshare.frida.re/@akabe1/frida-multiple-unpinning/
https://codeshare.frida.re/@pcipolloni/universal-android-ssl-pinning-bypass-with-frida/
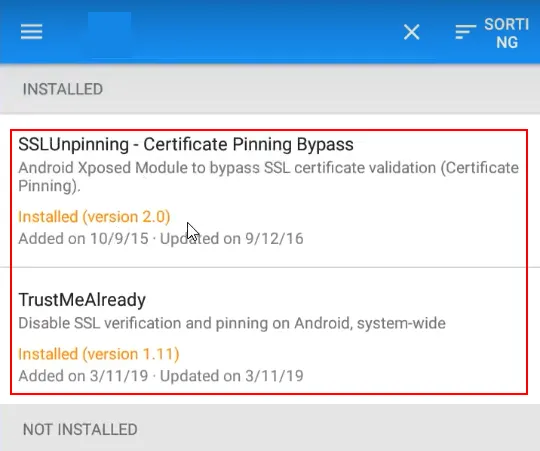
2.4 Using Xposed Framework
If your device is rooted with Xposed framework, then you can try the following modules to bypass the pinning
- ac-pm/SSLUnpinning_Xposed: Android Xposed Module to bypass SSL certificate validation (Certificate Pinning). (github.com)
- ViRb3/TrustMeAlready: 🔓 Disable SSL verification and pinning on Android, system-wide (github.com)
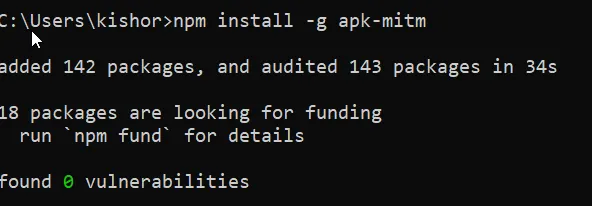
2.5 Using apk-mitm
apk-mitm is a CLI application that automatically prepares Android APK files for HTTPS inspection by modifying the apk files and repacking.
Repo:
apk-mitm can be pulled out using npm.
Step 1: Run the apk-mitm as shown in below.
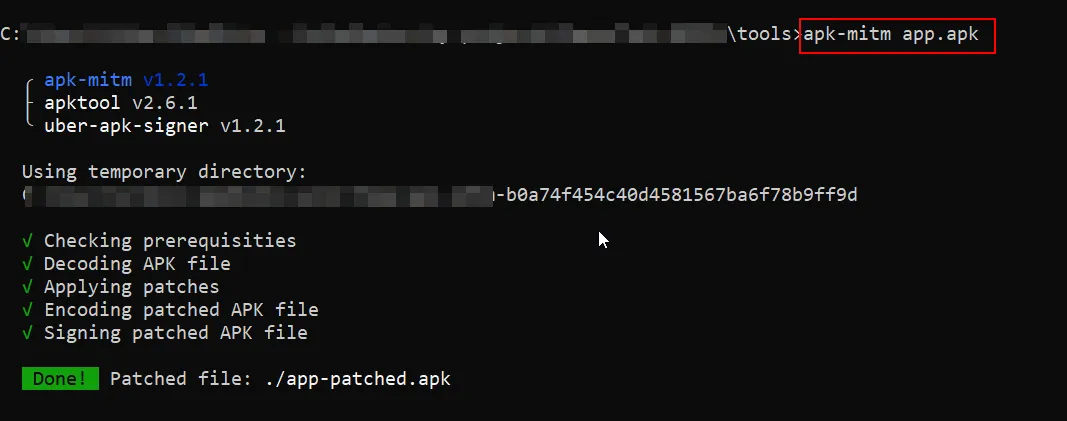
Thats it, apk-mitm has done its part. Now we can install the patched apk and intercept the application traffic.
2.6 Modifying the network_security_config.xml file
The Network Security Configuration lets apps customize their network security settings through a declarative configuration file. The entire configuration is contained within this XML file, and no code changes are required.
Source: Network security configuration | Android Developers
The Network Security Configuration works in Android 7.0 or higher.
Step 1: Decompile the android application with apktool or alternatives. And locate the network_security_config.xml file under /res/xml.
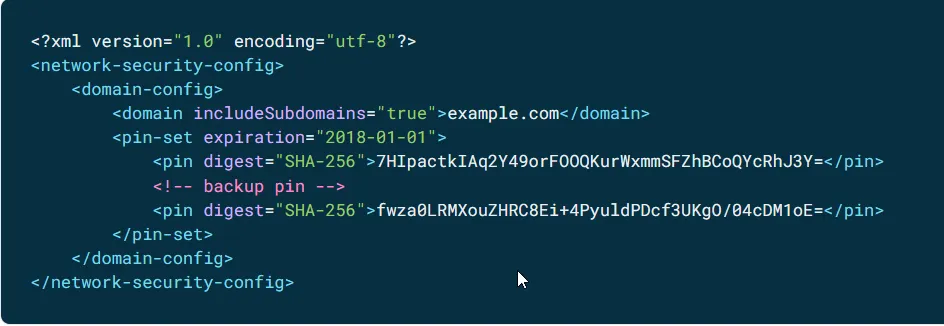
Step 2: The file may look like this if the app has pinned its own CA certificates.
Step 3: Remove that … </pin-settag section and add the following:
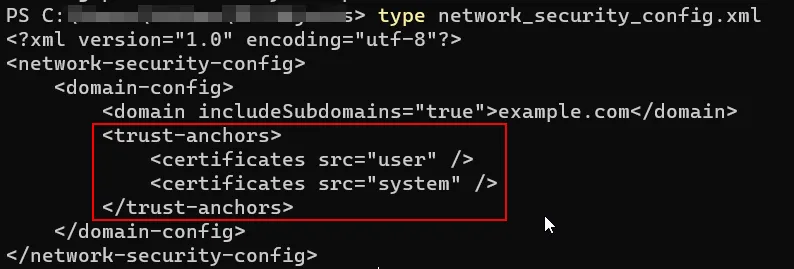
Step 4: Now save the file and Re-pack the application using apktool and uber-apk-signer (For signing the modified apk).
Thats it, install our new apk and your are good to go.
3. What if the application is not getting intercepted and also not showing any errors !!
Here the first thing pop-up in my mind is “Flutter”. The flutter based applications are basically “Proxy unaware”.
So here comes our hero “Reflutter” :
“This framework helps with Flutter apps reverse engineering using the patched version of the Flutter library which is already compiled and ready for app repacking. “
Repo: https://github.com/Impact-I/reFlutter
Step 1: install the reflutter using pip
Step 2: Follow the commands illustrated in the below screenshot.
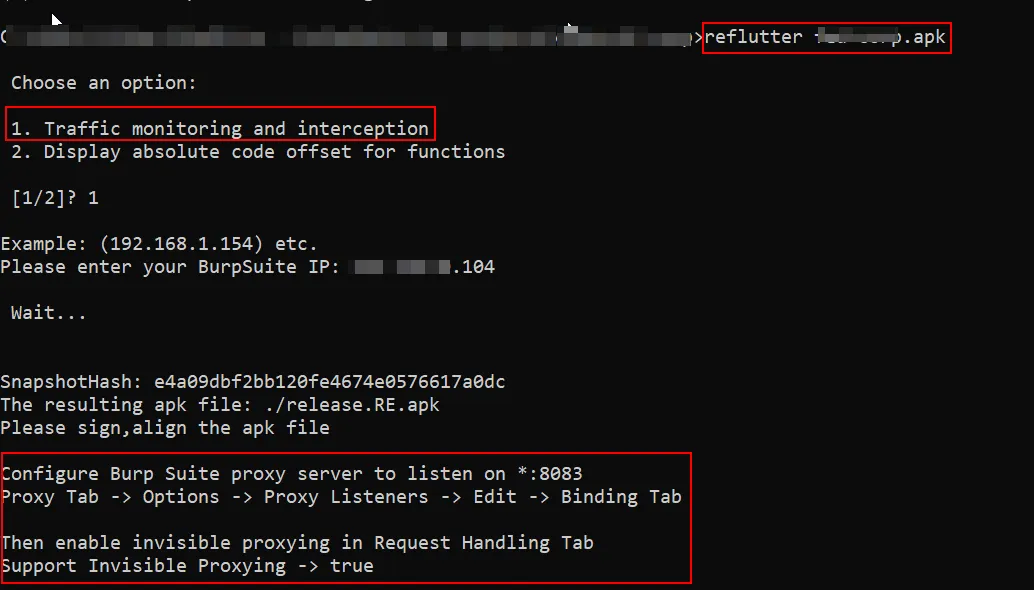
Step 3: Sign the application using uber-apk-signer or any alternatives and install it.
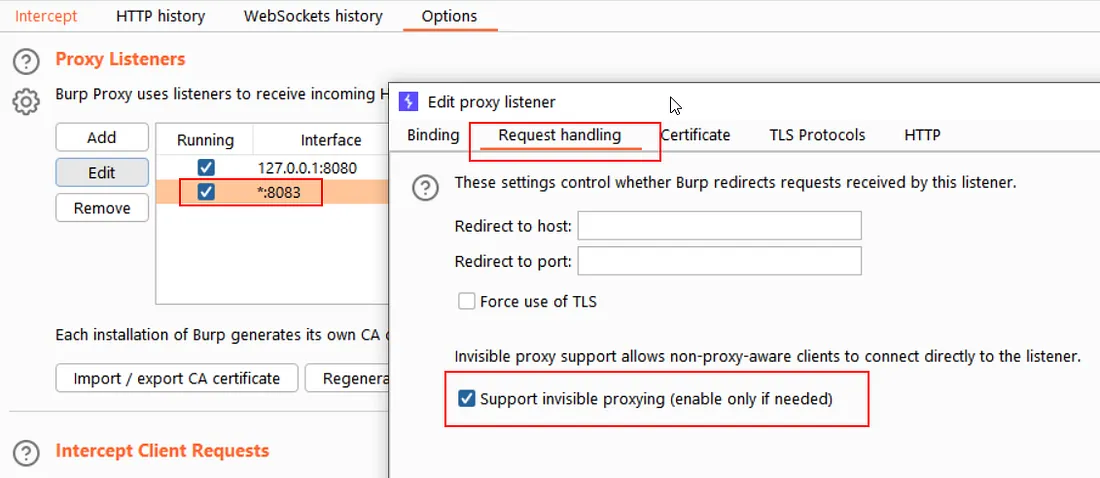
Step 4: Now in Burp proxy, Start listening the port 8083 and also enable “Support Invisible Proxying”.
That’s it peeps, you are all good to go … !
4. My application is using HTTP only but Still I am not able to Intercept!!
Hmm..That’s a kinda weird , But it happens sometimes.
Applications with this behaviour, are basically called “Proxy Unaware” applications. Such applications route the traffic directly to the internet without cooperating with system wide Proxy settings.
Time to bypass:
For this method, I would like to thank brother Faris ❤.
(60) Faris Mohammed | LinkedIn
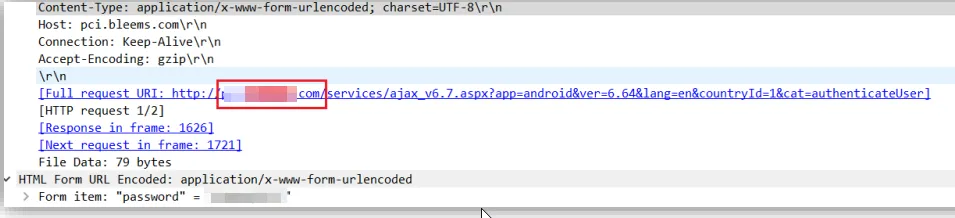
Step 1: Find out the domain address to which the App is communicating using Wireshark. Shown Below.
Step 2: Decompile the application using apktool
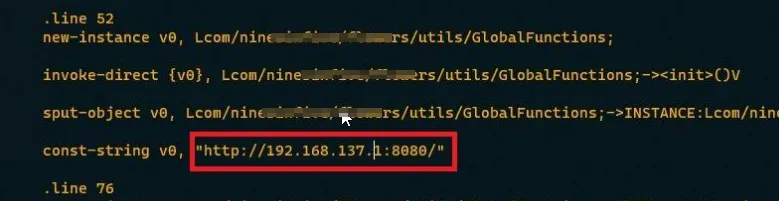
Step 3: Enter the decompiled folder and use the ack/grep tool to find out the file in which the domain name is mentioned.

Step 4: Replace the domain name with the IP address and Port of BurpSuite.
Step 5: Re-pack the application, sign it and install it on the android device.
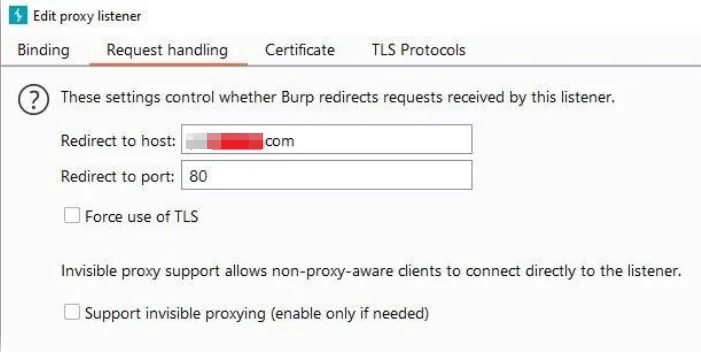
Step7: In the BurpSuite proxy, From the Request handling tab, give redirect host and port as the original domain address which was used by app in the first place.
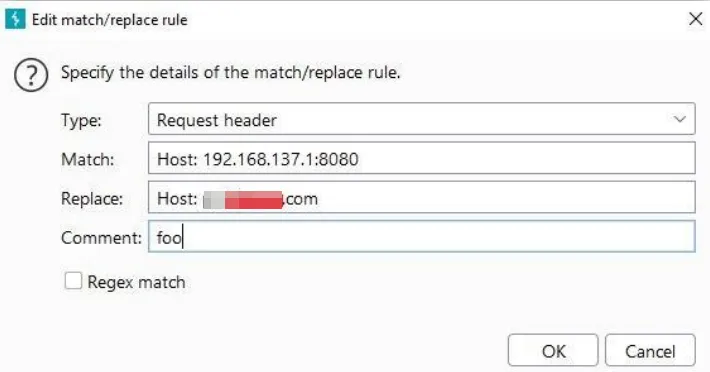
Step 8: Setup match and replace in the proxy options to replace the Host header value from the burp listener IP address to original domain address of the application
Thats it. Now the application’s HTTP traffic will be captured in our Burp proxy.
Note: _— Here, Since we replace the hardcoded application domain, we don’t need to setup device proxy since the application directly communicates with the hardcoded domain (We have replaced it with our proxy IP).