The following article describes how to configure a secure self-hosting web infrastructure with support for multiple apps. It’s really detailed and you don’t feel overwhelmed to be encouraged to setup on your home server.

Hello 👋!
Yes you read this well. Self hosting made: Easy. Free. Secure. With a machine running at your house, not in the cloud. Even if you’ve never done that before.
That said, if you prefer to apply all this on a server you rent to some provider, it’ll work the exact same way. You’ll just skip the chapter on the router configuration.
Let’s clarify from the start what I mean by:
- Easy: The first setup isn’t necessarily easy (nor complicated). But it takes a bit of time. We’ll go through it all together. Once it’s done, adding new apps will take a few seconds or minutes based on how complex the docker strategy is (integrated database or separate container to run Postgres for example)
- Free: You will not have to pay monthly or yearly bills for a server you rent online and a domain name because I’ll explain how to setup everything locally using your desktop, laptop or a spare computer that you can keep open. You’d still have to pay for a machine if you don’t have a spare one, as well as electricity to run it. That said, as a metric for this, my server has consumed ~60kwh in 6 months which makes it ~10kwh/month or ~2€/month.
Intro
Have you ever wished to self host one of the +1000 brilliant open source project listed in awesome-self hosted? A project of your own? A school project? Or anything else that is web based? Sky (or the RAM of your server) is the limit!
If you’re afraid of:
- 🕵️♂️ Online solutions that have no respect for your privacy
- 💸 Online hosting solutions where you’re 100% in control of the server and apps, but it can be expensive
- 🤷♂️ How to configure NGINX as it seems too complicated
- 🛡️ Expose your services safely on the internet
Fear no more! In this blog post we’ll be starting from scratch, all the way up to have a local stack safely accessible from the outside of our own network.
What we will achieve
Here’s the high level breakdown of what we’ll do:
- Install and use Docker + Docker Compose in order to have self contained applications
- Use DuckDNS to create a free domain name that we can point to our public IP to have access to our apps from outside our home network (note, you could skip this step and use your own domain name of course if you prefer to)
- Use SWAG to manage our NGINX server, SSL certificates and
fail2banto ban people trying to brute force our services - Use Authelia (combined to our NGINX in SWAG) to add a double authentication layer in front of all our services
- Discuss about how to open up the ports on a router to be able to have access to your apps from the internet
- Access the default monitoring dashboard of SWAG from internet, behind our double authentication layer
As a bonus and real life demo I’ll soon write another blog post for this serie, where we’ll add 3 brilliant applications:
- Paperless-ngx to manage all your digital documents
- Photoprism to manage all your pictures and videos
- Kopia to backup all your data from all the containers
At the end of this blog post, you will:
- Be able to have all this stack up and running
- Be in a position to add any other web app easily
Let’s get started! 🔥 Hang tight for the initial setup. Things will get way easier once this is done.
Architecture overview
As an image is often worth a thousands words, here’s the high level overview of what we’ll be setting up:
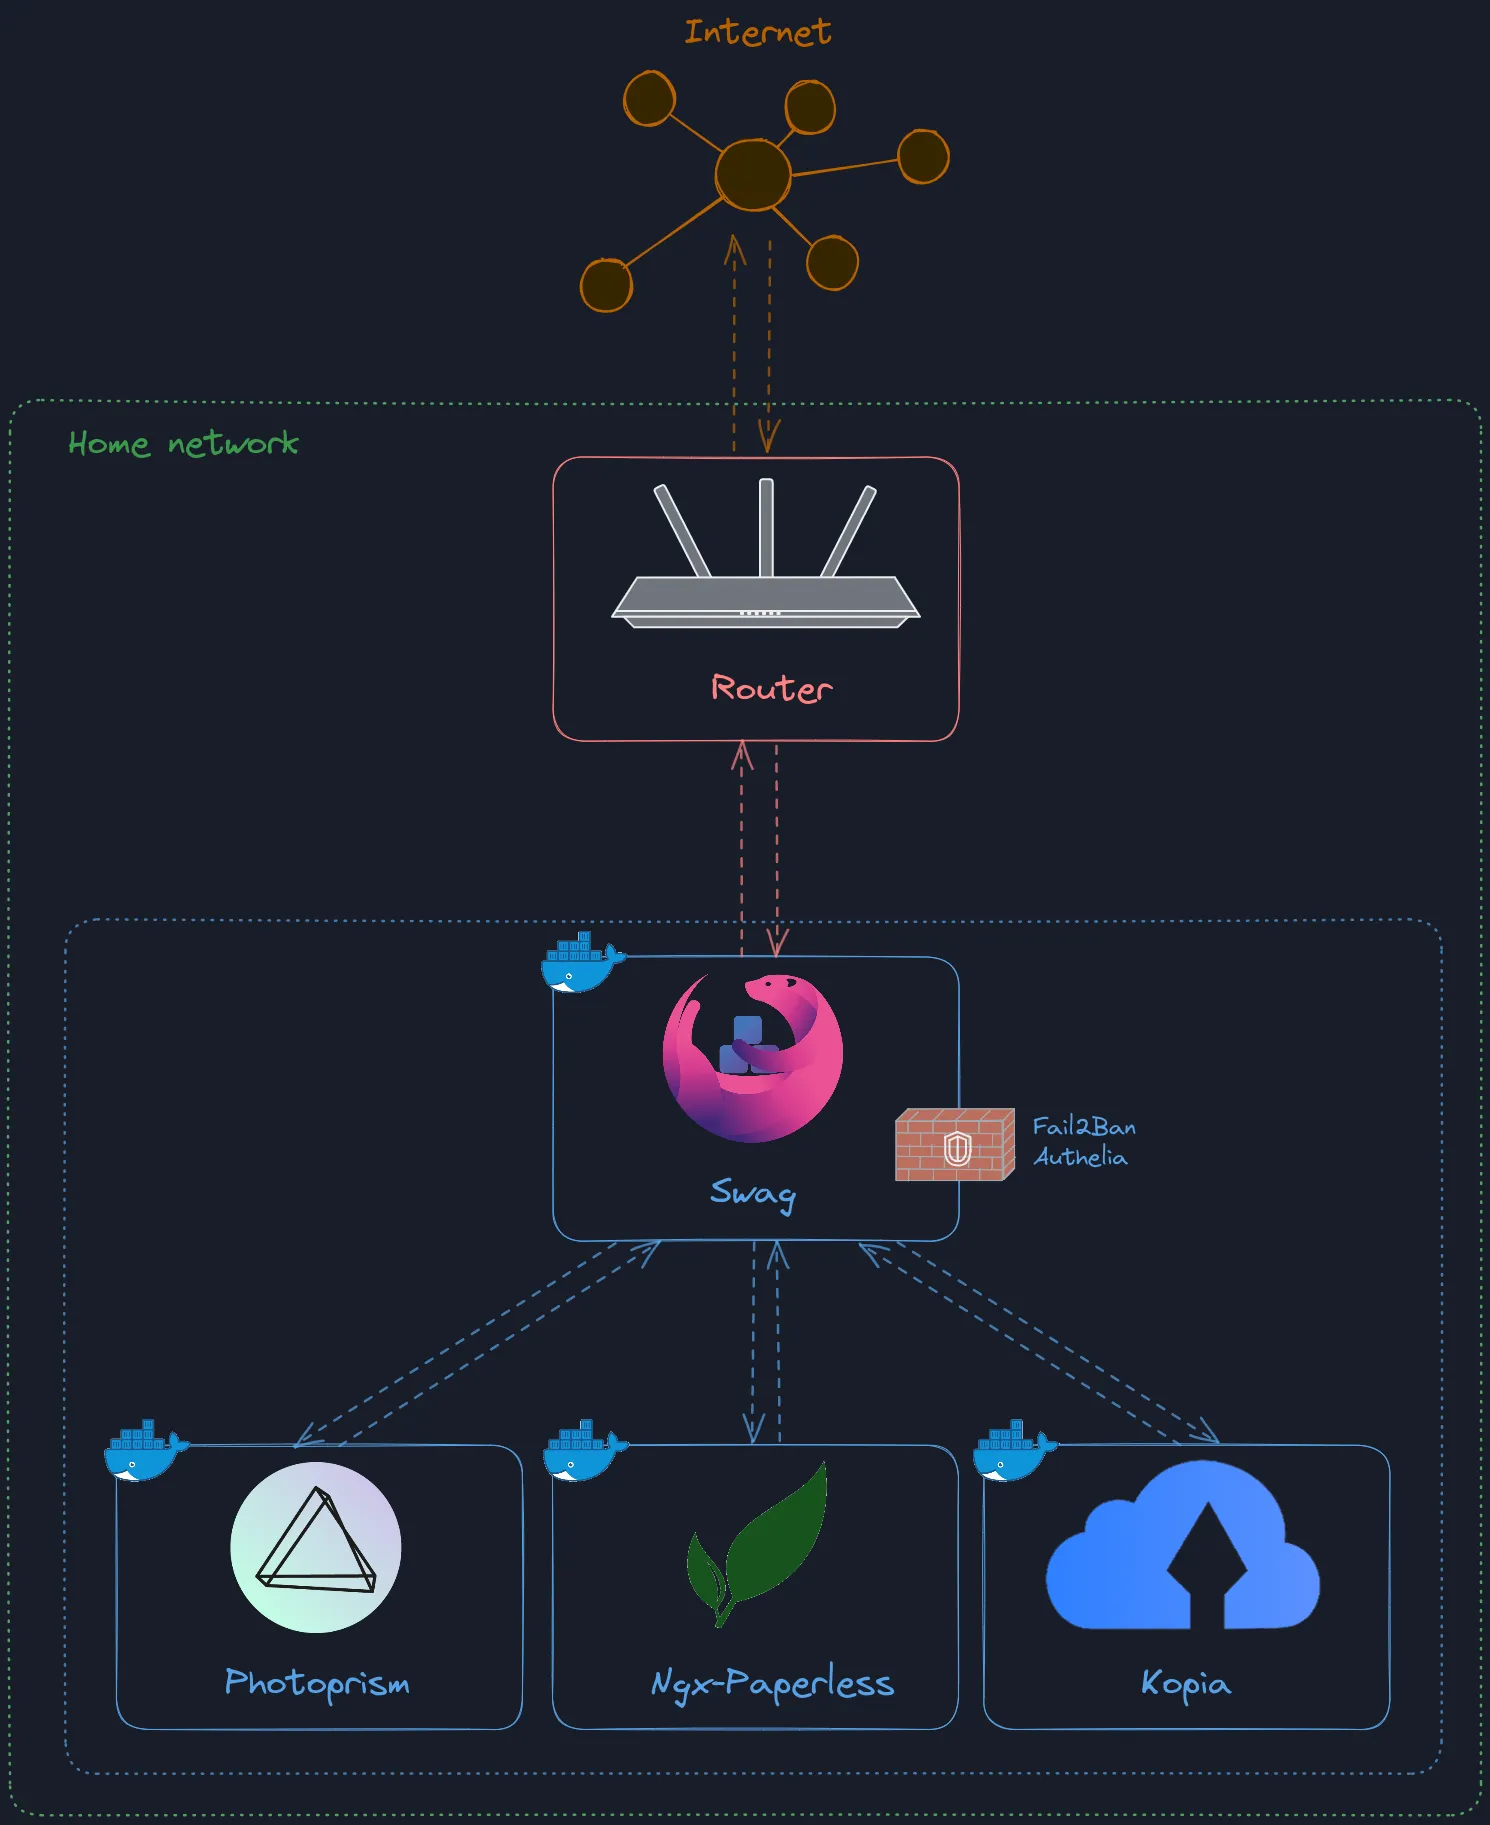
Note that we’ll add the 3 apps at the bottom only in the next post of the series.
DuckDNS setup
As mentioned previously, this part is optional and if you prefer to use your domain name instead you can.
Head over DuckDNS website and log in with the provider of your choice. You’ll be setup in a matter of seconds. You should land on this page:

Note that the token displayed in the middle of the page must be kept secret, never share it. We’ll get back to it soon.
In the domain input, type the domain name you wish to have pointing to your local setup. This will be the base of the public URL to access all your service. Something like https://yourdomain.duckdns.org.
You will only need one as we’ll be using sub domains so don’t name it for a specific app. For example, with the 3 apps we’ll be setting up in the next post, we’ll end up with the following URLs:
https://photoprism.yourdomain.duckdns.orghttps://paperless.yourdomain.duckdns.orghttps://kopia.yourdomain.duckdns.org
From this point, all the commands we run should be run on the machine you decide to use as the server. If you only want to try out this whole stack without having a server, you can definitely give it a go from your current computer as well and migrate the setup to a server if you wish later on. I am running on Ubuntu so all the command will be Ubuntu based. That said it should be quite trivial to change the OS specific commands to match yours.
Docker and Docker Compose setup
I’ll assume we start from scratch here. If you have Docker and Docker Compose installed already, you can skip this chapter.
Docker
Run the following:
sudo apt-get update -y

sudo apt-get install -y \
     ca-certificates \
     curl \
     gnupg \
     lsb-release

curl -fsSL https://download.docker.com/linux/ubuntu/gpg | sudo gpg --dearmor -o /usr/share/keyrings/docker-archive-keyring.gpg

echo \
  "deb [arch=$(dpkg --print-architecture) signed-by=/usr/share/keyrings/docker-archive-keyring.gpg] https://download.docker.com/linux/ubuntu \
  $(lsb_release -cs) stable" | sudo tee /etc/apt/sources.list.d/docker.list > /dev/null

sudo apt-get update -y

sudo apt-get install -y docker-ce docker-ce-cli containerd.io
Docker Compose
cd ~
mkdir .docker
DOCKER_CONFIG=${DOCKER_CONFIG:-$HOME/.docker}
mkdir -p $DOCKER_CONFIG/cli-plugins
curl -SL https://github.com/docker/compose/releases/download/v2.2.3/docker-compose-linux-x86_64 -o $DOCKER_CONFIG/cli-plugins/docker-compose
chmod +x $DOCKER_CONFIG/cli-plugins/docker-compose
Let’s make sure we can run Docker without being an admin:
Replace XXXXXXXXXX by your user name.
sudo usermod -a -G docker XXXXXXXXXX
newgrp docker
SWAG setup
If you wish to dig more into SWAG setup, here’s the official documentation.
SWAG is no exception to the rule and it’ll be ran as a Docker container. We will now create our docker-compose.yaml file that’ll let us define all the containers we want to run.
I’d recommend to create a new folder so that all the data from our several containers will be hosted in the same folder, making our lives easier for when we look into Kopia and the backup system. In my case, I’ve defined it at ~/opt which is a folder I’ve created myself. If you point to a different folder, make sure to update the paths accordingly in the docker compose file.
Create a file called docker-compose.yaml and paste the following in it:
version: '3.0'

services:
  swag:
    image: lscr.io/linuxserver/swag:latest
    container_name: swag
    cap_add:
      - NET_ADMIN
    env_file:
      - common.env
      - swag.env
    environment:
      - URL=yourdomain.duckdns.org
      - VALIDATION=duckdns
      - SUBDOMAINS=wildcard
      - DOCKER_MODS=linuxserver/mods:swag-dashboard
    volumes:
      - ~/opt/swag/config:/config
    ports:
      - 443:443
      # https://github.com/linuxserver/docker-mods/tree/swag-dashboard#internal-access-using-server-ip81
      # open port 81 for the dashboard
      - 81:81
    restart: unless-stopped
- Make sure to update the
URLin theenvironment. It’s the one you’ve defined in your DuckDNS earlier - Don’t forget to change the path for the volume if you’ve decided to put your files somewhere else than
~/opt. You could just put./swag/config:/configbut then you’d need to make sure to always launch the docker compose from that directory - Feel free to change the ports
443and81if they’re already taken to anything you’d like. Remember to only edit the port on the left side of the:as the one on the right is the internal binding for the container
Then create 2 files at the same level:
common.env:
PUID=1000
PGID=1000
TZ=Europe/Paris
To find out your own PUID and PGID, type in your console id and you’ll something like this:
$ id
uid=1000(maxime) gid=1000(maxime)
Use these 2 values.
As for the timezone TZ, you can find it here on Wikipedia, in the TZ Identifier column.
swag.env:
DUCKDNSTOKEN=xxxxxxxx-xxxx-xxxx-xxxx-xxxxxxxxxxxx
Of course, replace it with the token displayed on your DuckDNS page.
Time to start our first container!
$ docker compose up -d
It should pull the container if you don’t have it already and you should see a message like this:
✔ Container swag Started
To make double sure everything went well, we can also check the logs of the container:
$ docker logs swag
You’ll see a bunch of logs but the most important line being the last one: Server ready.
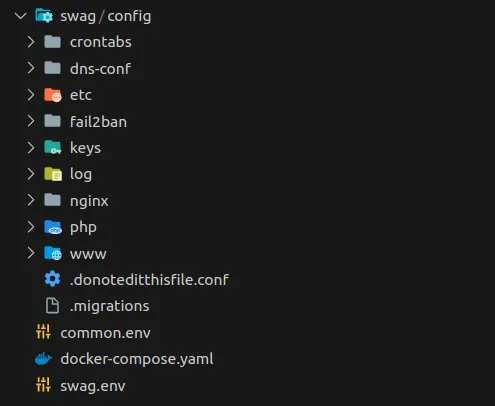
Notice as well that a swag folder was created!
Without further ado, let’s access the integrated SWAG dashboard… From the internet by configuring our router.
Router configuration
Whether you have your own router or the default “box” provided your internet provider, you will have access to all the settings. That said, each router has it’s own UI and I cannot cover all of these. So you will have to search a little bit in your router configuration to find out where you need to access the settings I’ll mention. If you don’t find them, Google is your friend for this part!
Search in the settings for DHCP. This will let us attribute a local static IP to our computer running SWAG. Create a new rule. It’ll ask you what’s the device you wish to configure. If it’s a little bit smart, it’ll list the devices and their IP and you’ll be able to select from there. If not, you’ll have to enter the current IP and the MAC address of the computer.
Once done, search for NAT & PAT or NAT forwarding or Port forwarding. This will let us bind a port of our public IP and redirect to a given local IP + port. In our case, we will need to have only 1 rule here as we’ll be using sub domains to have multiple apps under the same base domain. Create a new rule, for all the protocols (TCP+UDP). Define the external port to be 443. You’ll then need to point to a given internal IP and a given port. Specify your computer IP as for the port it’ll be 443 as well (or if you changed the 443 port of our docker-compose.yaml file, put the one you wrote here).
As we’ve passed the environment variable DOCKER_MODS=linuxserver/mods:swag-dashboard, SWAG gives us access to an admin dashboard. Therefore, if everything went well with the router configuration, we should now have access to it from internet! Try to access your domain name with the subdomain dashboard: https://dashboard.yourdomain.duckdns.org
You should see this 🎉:
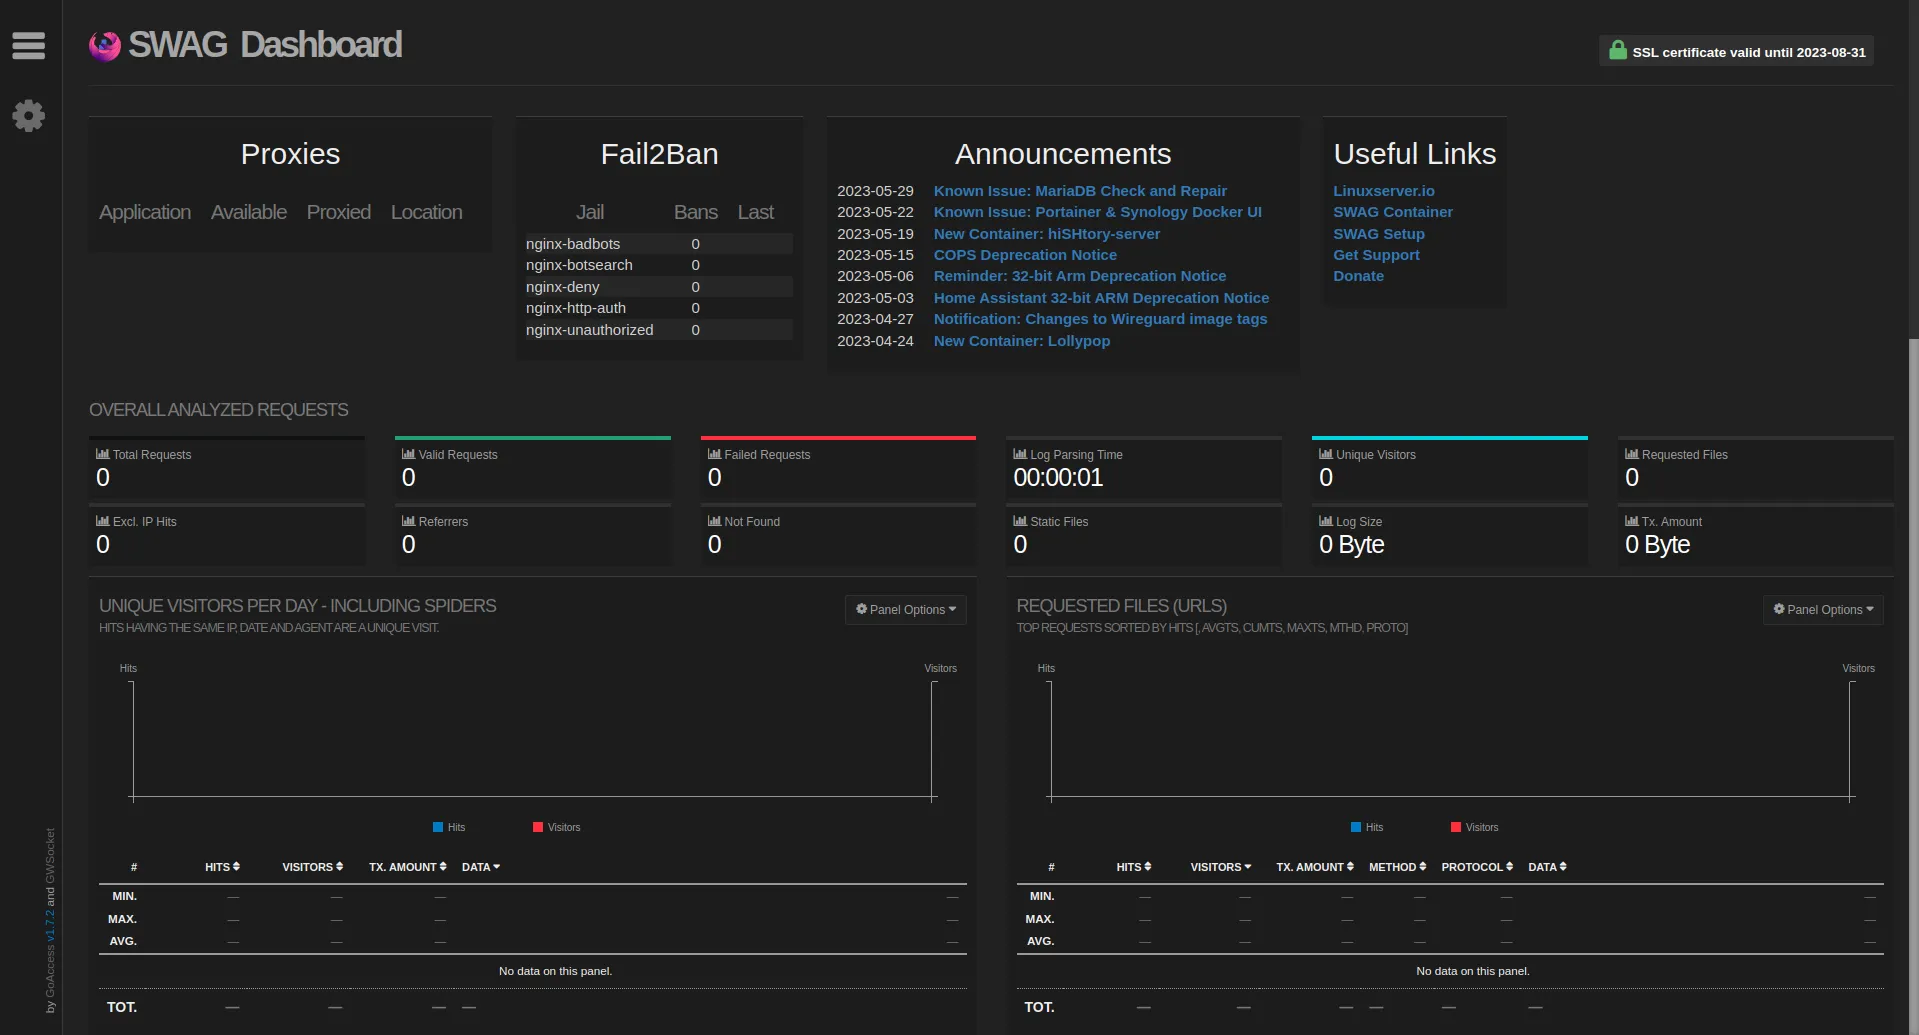
Feels awesome right?!
You may think though that it’s not really a good idea to expose an admin dashboard publicly on the internet. And you’d be right! Let’s jump into the next chapter to setup some additional security.
Authelia and double authentication
Authelia is a fantastic piece of open source software which:
Authelia is an open-source authentication and authorization server and portal fulfilling the identity and access management (IAM) role of information security in providing multi-factor authentication and single sign-on (SSO) for your applications via a web portal. It acts as a companion for common reverse
Essentially, it’ll let you put an (extra) authentication layer 🔐 in front of any deployed services 🛡️. You can setup 2 factor authentication (2FA) for reinforced security as well. 🍒 on the cake, you can even define per user access to your apps. To be clear, if an app you deploy has already a login/password access, you can decide to expose it on the internet. But if the security of that app is weak, you may be in troubles. Authelia lets you plug an extra layer with 2FA in front. You’ll only have to log once to Authelia and then still log independently to any app that has its own id/password login. Let’s crack on!
Add the following service to our docker-compose.yaml file:
# to add a user, add directly to `authelia/users_database.yml`
# then get the encrypted password with
# docker run --rm ghcr.io/authelia/authelia:4.34.6 authelia hash-password yourpassword
# https://www.linuxserver.io/blog/2020-08-26-setting-up-authelia#users_database-yml
authelia:
  image: ghcr.io/authelia/authelia:4.34.6
  container_name: authelia
  env_file:
    - common.env
  volumes:
    - ./authelia:/config
  restart: unless-stopped
Run docker compose up -d so that the Authelia container gets started as well.
You’ll see that a new folder authelia will be created with 1 file. But if we look into the logs, we can see that something needs to be fixed before we can actually use Authelia:
$ docker logs authelia
Gives us:
time="2023-06-02T22:34:09+02:00" level=error msg="Configuration: storage: option 'encryption_key' must is required"
time="2023-06-02T22:34:09+02:00" level=fatal msg="Can't continue due to the errors loading the configuration"
This is normal, it’s because it’s the first time the app is launched and for security reason, we need to change some default values in the config. Let’s edit authelia/configuration.yml and replace it with the following:
# https://www.linuxserver.io/blog/2020-08-26-setting-up-authelia

server:
  host: 0.0.0.0
  port: 9091
  read_buffer_size: 4096
  write_buffer_size: 4096
  path: 'authelia'
log:
  level: info
  file_path: /config/logs/authelia.log
jwt_secret: TODO_SOME_RANDOM_SECRET_HERE
default_redirection_url: https://authelia.yourdomain.duckdns.org
totp:
  issuer: authelia.yourdomain.duckdns.org
authentication_backend:
  disable_reset_password: true
  file:
    path: /config/users_database.yml
    password:
      algorithm: argon2id
      iterations: 1
      key_length: 32
      salt_length: 16
      memory: 512
      parallelism: 8
access_control:
  default_policy: deny
  rules:
    - domain:
        - yourdomain.duckdns.org
        - '*.yourdomain.duckdns.org'
      policy: two_factor
      subject:
        - 'user:TODO_YOUR_AUTHELIA_USER_NAME_HERE'
session:
  name: authelia_session
  secret: TODO_SOME_OTHER_RANDOM_SECRET_HERE
  expiration: 1h
  inactivity: 5m
  remember_me_duration: 1M
  domain: yourdomain.duckdns.org
regulation:
  max_retries: 3
  find_time: 2m
  ban_time: 5m
storage:
  encryption_key: TODO_SOME_RANDOM_ENCRYPTION_KEY_HERE
  local:
    path: /config/db.sqlite3
notifier:
  disable_startup_check: false
  filesystem:
    filename: /config/notification.txt
Update all the following:
TODO_SOME_RANDOM_SECRET_HERETODO_YOUR_AUTHELIA_USER_NAME_HERETODO_SOME_OTHER_RANDOM_SECRET_HEREyourdomainTODO_SOME_RANDOM_ENCRYPTION_KEY_HERE
For secrets and encryption keys, generate long and random strings❗
To avoid an error with the container, create an empty file: authelia/logs/authelia.log.
Then do docker compose down && docker compose up -d.
You should see a bunch of new files created in the authelia folder and docker logs authelia shall show a few level=info but no errors ✅.
Last but not least, we need to add a user otherwise it’ll be hard to log in!
Launch the following command to encrypt your chosen password for Authelia:
$ docker run --rm authelia/authelia:latest authelia hash-password yourpassword
Change of course yourpassword to a very strong password as this will be your entry point to Authelia. Generating it using a password manager is a good idea.
It’ll then print the encrypted password to the console. Keep it there for now and head over authelia/users_database.yml.
Edit this file with the following content:
users:
  your-user-name:
    displayname: 'your-user-name'
    password: 'Put the hashed password generated here starting with $argon2'
Don’t forget to change the username (twice) to whatever you want and update the password with the one we just generated.
Now that Authelia is configured, let’s expose it through a given subdomain. For this, thanks to all the templates that SWAG has, it’s really easy for most apps that we want to add!
In this case, copy swag/config/nginx/proxy-confs/authelia.subdomain.conf.sample to swag/config/nginx/site-confs and rename authelia.subdomain.conf.sample to authelia.subdomain.conf.
Restart both services with docker compose down && docker compose up -d then go to https://authelia.yourdomain.duckdns.org and…
VICTORY! 🎉
If you try to log in, you’ll get a message saying that you need to activate double authentication to access that resource. And it makes sense as we’ve specified this as the default in our config! Click on this button:
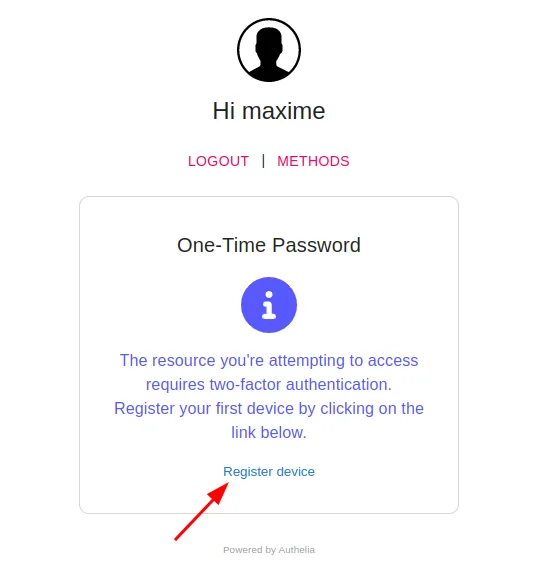
You’ll see a notification:

It’s obviously not true because we haven’t setup any email provider but Authelia has a clever trick and writes the content instead to authelia/notification.txt. It’ll look like this:
Date: 2023-06-02 23:13:28.051443925 +0200 CEST m=+216.364147029
Recipient:
Subject: Register your mobile
Body:
This email has been sent to you in order to validate your identity.
If you did not initiate the process your credentials might have been compromised. You should reset your password and contact an administrator.

To setup your 2FA please visit the following URL: https://authelia.yourdomain.duckdns.org/one-time-password/register?token=some-random-token

Please contact an administrator if you did not initiate the process.
Open up the link that’s written and it’ll show you a page with a QR code.
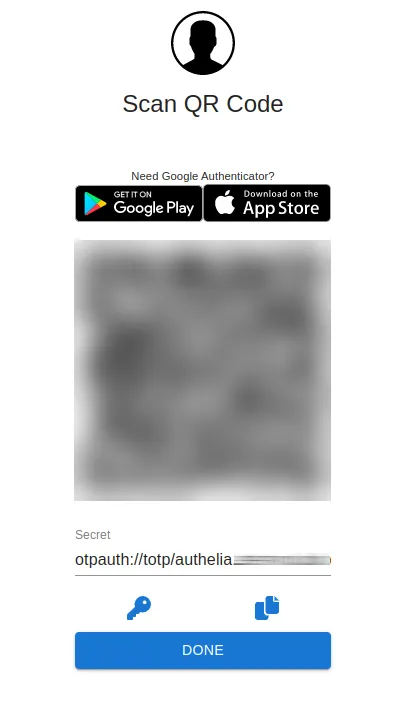
With your favourite 2FA authentication app, add it. For example you can use Google Authenticator.
Brilliant! We’ve got Authelia and 2FA setup 🔥!
But wait, our dashboard at https://dashboard.yourdomain.duckdns.org is still not protected. Let’s edit swag/config/nginx/proxy-confs/dashboard.subdomain.conf but first: Note that, usually the proxy-confs contains all the templates and for the apps you want to expose, you copy one the corresponding template to the site-confs folder next to it. In this case the dashboard template is here by default for some reason, feel free to move it to site-confs instead!
Anyway, let’s edit dashboard.subdomain.conf. All you have to do for every new .conf file that you use to expose a new service, is to check for the lines with a comment
# enable for Authelia
and uncomment the next line. Make sure you do that on all occurrences of the comment.
There should be at least:
include /config/nginx/authelia-server.confinclude /config/nginx/authelia-location.conf
In this case, there are 5 lines to uncomment ⚠️!
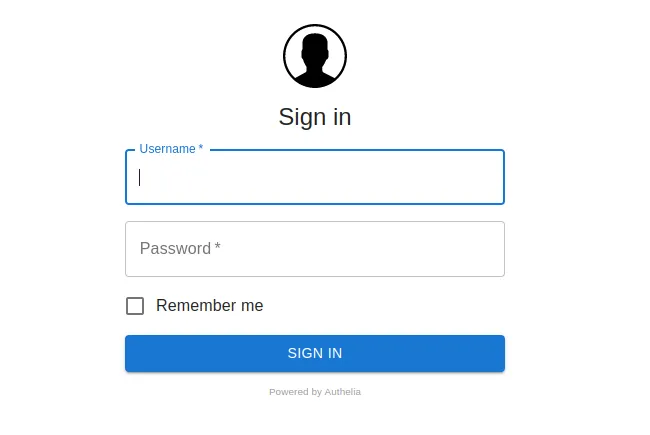
Now reload both services: docker compose down && docker compose up -d and head over your dashboard. It should not be accessible directly and you shall see the Authelia authentication page.
Pro tip 💡: Notice how the URL goes from https://dashboard.yourdomain.duckdns.org to something like https://dashboard.yourdomain.duckdns.org/authelia/?rd=https%3A%2F%2Fdashboard.yourdomain.duckdns.org%2F ?
If you’re using a password manager, assuming it’s got regex support for URL detection, it’s possible to separate your apps from the Authelia login which is very convenient instead of having a domain match that’d just always show you the Authelia entry as the domain doesn’t change when Authelia login shows up. It’s just the end of the URL.
For your Authelia entry in your password manager, enter this:
https:\/\/([1-9-a-z-]*)\.yourdomain\.duckdns\.org\/authelia
For all your apps, enter this (example with Paperless that we’ll setup later):
^https\:\/\/paperless\.yourdomain\.duckdns\.org(?!(/authelia))
This way, when your app doesn’t open the Authelia page your password manager will only show 1 entry for the app, and when Authelia shows up it’ll only show Authelia, not all of your apps entries.
I believe data privacy is important and being able to self host applications where you own your data is like a super power. In the next post of the series, I’ll show how to setup 3 of my favourites open source apps to manage your documents, pictures and backup all that safely.
Paperless-ngx
The description of the project on Github is:
A community-supported supercharged version of paperless: scan, index and archive all your physical documents
I’ve been using Paperless-ngx for months now and I’m truly impressed that an open source, non commercial project (in any way) can be this good. Start uploading all your documents, add a few tags, correspondents, documents types, start assigning those to the documents you’ve imported and let the magic happen 🪄. Paperless-ngx will learn from your documents and habits, and then be able to automatically assign tags, correspondents, types, dates etc. The initial phase on which you have to upload and tag all your documents (could be thousands) can be time consuming based on how many you want to triage at first. But once that’s done and you enter “routine mode”, uploading documents one at a time when you receive them, will take only seconds.
It’s 100 times better than saving documents on a Google Drive like service where you organize documents by folder IMO. I was never satisfied with any of the option I had. Organized folders by year? Types? Correspondents? What happens the day you want to search by another criteria? Not a very good experience.
Here are some of the features highlights for Paperless-ngx:
- 💅 Nice web UI
- ⚙️ Upload multiple documents and they’ll be queued/processed quickly and analysed/indexed
- 👀 OCR is ran on all the documents, meaning that even if you upload pictures, you’d still be able to search by text
- 👫 Users and groups permissions. You can have multiple users on the same instance and easily share documents
- 🔎 Fantastic filtering to find any document quickly. Date range, tags, correspondents, document types, actual content, even though it was a picture thanks to the OCR mode…
Setup in our Docker Compose
The first thing we need to do is to get the service up and running. We’ll see how to expose it through swag as a new sub domain right after.
Open up the docker-compose.yaml file we created in the previous blog post and add the following 3 services:
Remember to edit the volumes path if you don’t want to save the data in ~/opt folder.
--- # ----------------------------
# ----------------------------
# PAPERLESS-NGX
# Source: https://github.com/paperless-ngx/paperless-ngx/blob/main/docker/compose/docker-compose.mariadb.yml
# to add a user: `docker compose run --rm paperless-ngx-webserver createsuperuser`
paperless-ngx-broker:
  image: docker.io/library/redis:7
  container_name: paperless-ngx-broker
  env_file:
    - common.env
  restart: unless-stopped
  volumes:
    - ~/opt/paperless-ngx/broker:/data

paperless-ngx-db:
  image: docker.io/library/mariadb:10
  container_name: paperless-ngx-db
  restart: unless-stopped
  volumes:
    - ~/opt/paperless-ngx/db:/var/lib/mysql
  env_file:
    - common.env
    - paperless-ngx.database.env
  environment:
    - MARIADB_HOST=paperless
    - MARIADB_DATABASE=paperless
    - MARIADB_USER=paperless

paperless-ngx-webserver:
  image: ghcr.io/paperless-ngx/paperless-ngx:latest
  container_name: paperless-ngx-webserver
  restart: unless-stopped
  depends_on:
    - paperless-ngx-db
    - paperless-ngx-broker
  healthcheck:
    test: ['CMD', 'curl', '-f', 'http://localhost:8000']
    interval: 30s
    timeout: 10s
    retries: 5
  volumes:
    - ~/opt/paperless-ngx/webserver/data:/usr/src/paperless/data
    - ~/opt/paperless-ngx/webserver/media:/usr/src/paperless/media
    - ~/opt/paperless-ngx/webserver/export:/usr/src/paperless/export
    - ~/opt/paperless-ngx/webserver/consume:/usr/src/paperless/consume
  env_file:
    - common.env
    - paperless-ngx.database.env
  environment:
    - PAPERLESS_REDIS=redis://paperless-ngx-broker:6379
    - PAPERLESS_DBENGINE=mariadb
    - PAPERLESS_DBHOST=paperless-ngx-db
    - PAPERLESS_DBUSER=paperless
    - PAPERLESS_DBPORT=3306
    - PAPERLESS_URL=https://paperless-ngx.yourdomain.duckdns.org
# ----------------------------
Also remember to edit the PAPERLESS_URL with yourdomain and replace accordingly.
Then create at the same level of the docker-compose.yaml a file called paperless-ngx.database.env with the following content:
MARIADB_ROOT_PASSWORD=GENERATE_STRONG_PASSWORD_1_HERE
MARIADB_PASSWORD=GENERATE_STRONG_PASSWORD_2_HERE
PAPERLESS_DBPASS=PUT_THE_SAME_AS_STRONG_PASSWORD_2_HERE
Let’s spin those up!
docker compose up -d
and add a user:
docker compose run --rm paperless-ngx-webserver createsuperuser
It’ll prompt you from the command line to enter a few info and then you should end up with this message:
Superuser created successfully.
Time to expose our application to access it.
Expose the service with SWAG and NGINX
Whenever you want to expose a new application, the first thing to do is check if there’s a pre-defined templates offered already for us in swag/config/nginx/proxy-confs. Unfortunately, that’s not the case for Paperless-ngx. Maybe it’ll be added later on!
This is not an issue at all though, because they offer a default template that works straight away in most cases. Copy swag/config/nginx/proxy-confs/_template.subdomain.conf.sample to swag/config/nginx/site-confs and rename it paperless-ngx.conf in the new folder.
Edit it to end up with:
server {
    listen 443 ssl;
    listen [::]:443 ssl;

    server_name paperless-ngx.*;

    include /config/nginx/ssl.conf;

    client_max_body_size 0;

    # enable for ldap auth (requires ldap-location.conf in the location block)
    #include /config/nginx/ldap-server.conf;

    # enable for Authelia (requires authelia-location.conf in the location block)
    include /config/nginx/authelia-server.conf;

    location / {
        # enable the next two lines for http auth
        #auth_basic "Restricted";
        #auth_basic_user_file /config/nginx/.htpasswd;

        # enable for ldap auth (requires ldap-server.conf in the server block)
        #include /config/nginx/ldap-location.conf;

        # enable for Authelia (requires authelia-server.conf in the server block)
        include /config/nginx/authelia-location.conf;

        include /config/nginx/proxy.conf;
        include /config/nginx/resolver.conf;
        set $upstream_app paperless-ngx-webserver;
        set $upstream_port 8000;
        set $upstream_proto http;
        proxy_pass $upstream_proto://$upstream_app:$upstream_port;
    }
}
Note that the line server_name paperless-ngx.*; is the one defining the name of our sub domain which in this case will be paperless-ngx. You can totally change that to whatever you prefer, could be paperless or documents for example. Just remember to update our environment variable PAPERLESS_URL in our docker-compose.yaml accordingly.
Once this file is added, we’re pretty much done already! All we’ve got to do now is to restart SWAG so that it takes it into consideration.
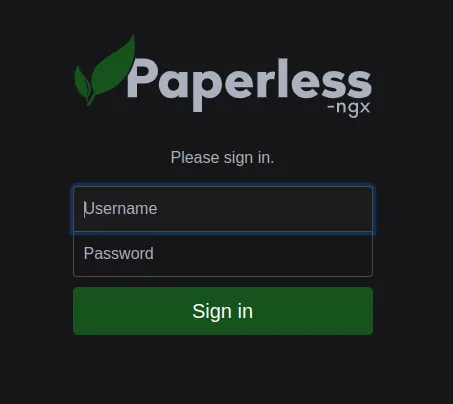
Open up the URL https://paperless-ngx.yourdomain.duckdns.org and 🥁…
This is because we’ve made sure above to uncomment the 2 lines
# enable for Authelia (requires authelia-location.conf in the location block)
include /config/nginx/authelia-server.conf;
and
# enable for Authelia (requires authelia-server.conf in the server block)
include /config/nginx/authelia-location.conf;
But once we authenticate:
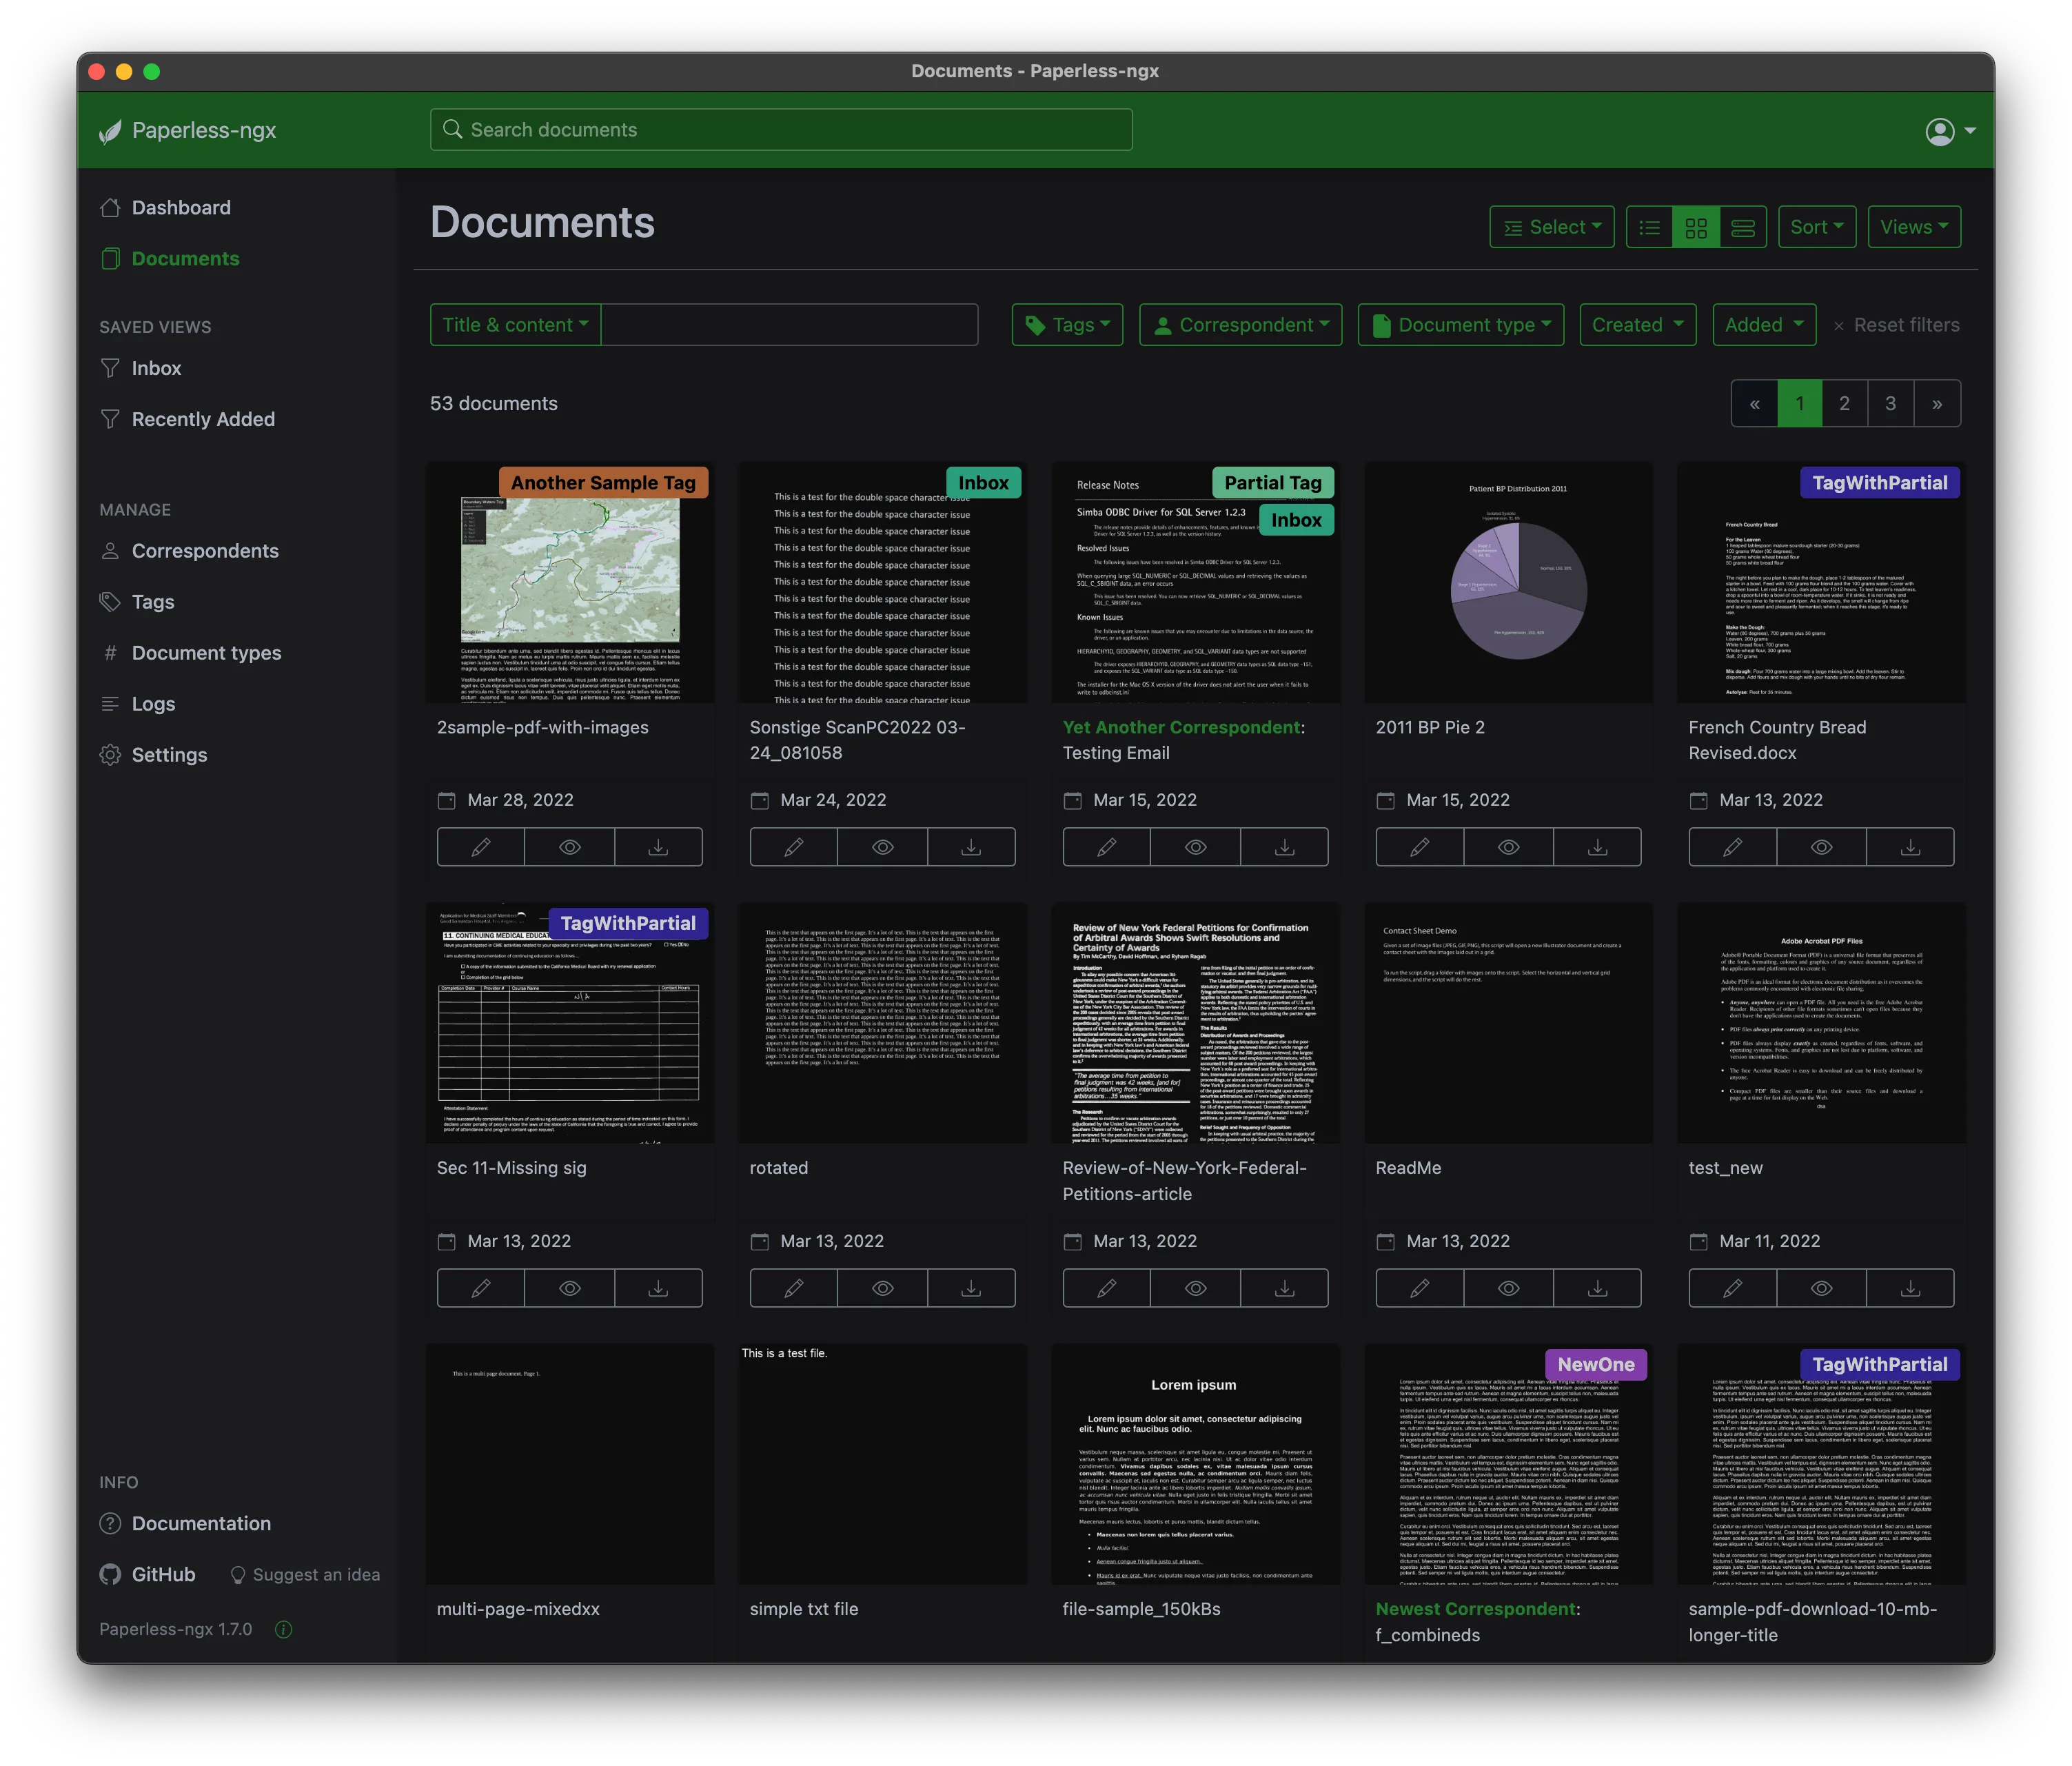
We’ve got our app running 🎉!
Log in with the user you created earlier and:
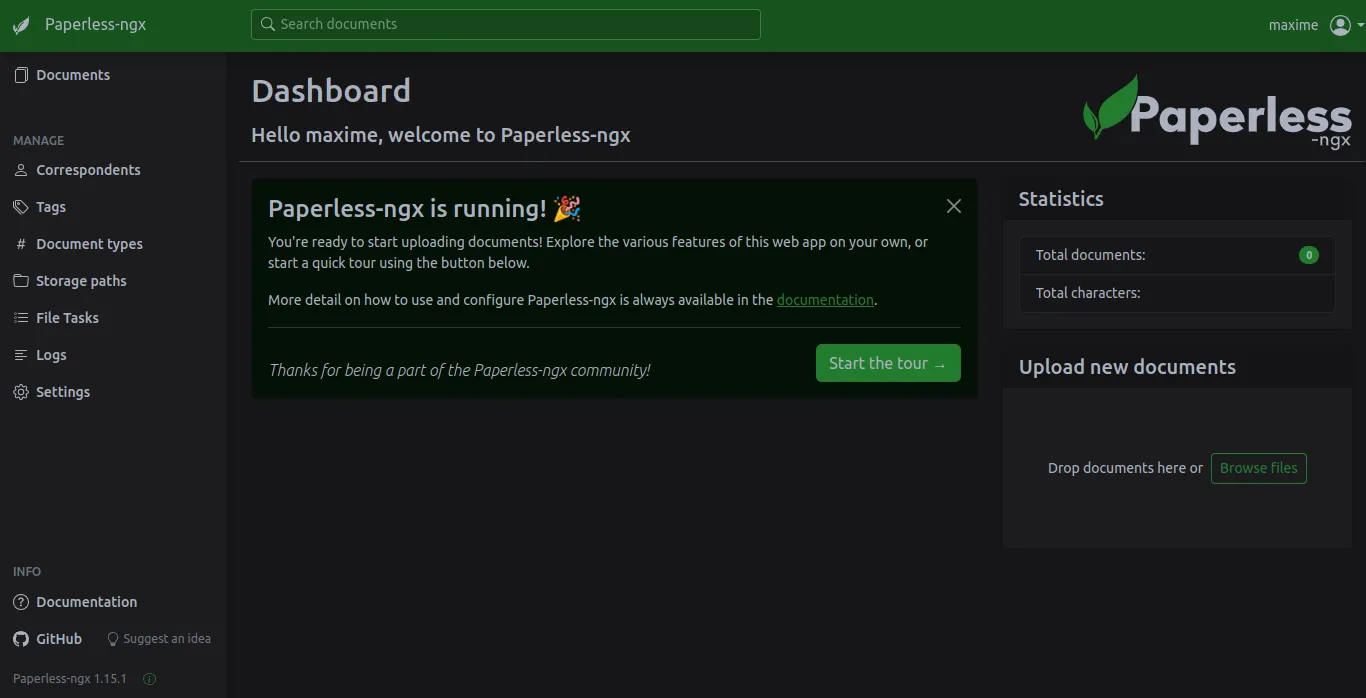
You can now enjoy your Paperless-ngx instance and start uploading your documents! While it uploads and before you start organizing them, I’d definitely recommend to read the best practices guide from the official documentation.
Conclusion
Adding a new service is as simple as finding the Docker Compose configuration, often offered by the project you’re trying to run, in their documentation and adding one NGINX config file in SWAG to expose it, safely behind your 2FA security with Authelia.
Happy document triaging!